Your phone charges only if you hold the cable at an angle. The plug no longer clicks into place. Or charging cuts in and out even after you switch cables. Before assuming the battery or charging port has failed, check for the most common culprit: compacted pocket lint. Knowing how to clean charging port safely can restore a solid connection without turning a small problem into an expensive repair.
Charging ports are small, exposed, and easy to clog. A phone that spends every day in a pocket, bag, or car collects dust, fibers, and debris over time. The buildup gets pressed deeper whenever you plug in a cable. The goal is not to scrape the port spotless. It is to remove loose debris carefully while protecting the delicate pins inside.
First, make sure the port is actually the problem
A dirty port often causes recognizable symptoms. Your cable may feel loose, fail to click in fully, or disconnect with a slight movement. You might also see slow charging, repeated connection alerts, or a charger that works with another device but not yours.
Still, dirt is not the only explanation. Try a second known-good cable and charging adapter first. Cables wear out, especially near the connector, and low-quality adapters can cause inconsistent charging. Check the cable tip too. If it is bent, corroded, loose, or covered in grime, replace it rather than forcing it into the phone.
If your device has been dropped, exposed to water, or shows a liquid-detection warning, do not clean or charge the port right away. A physical fault or moisture issue needs a different approach.
What you need to clean a charging port safely
Keep the tools simple. You do not need a repair kit full of sharp metal picks. In fact, the wrong tool is the fastest way to damage a USB-C, Lightning, or Micro-USB port.
Use these instead:
- A bright flashlight or your phone’s camera with another light source
- A wooden toothpick or nonmetal plastic pick with a fine tip
- A soft, clean, dry brush, such as a small anti-static or soft-bristle brush
- A clean microfiber cloth for the outside of the phone
Avoid needles, paper clips, safety pins, tweezers, knives, and SIM-eject tools. Metal can scratch or bend the internal contacts, and it can create a short if the phone is powered on. Also skip cotton swabs. Their fibers can get stuck in the port and make the clog worse.
Do not pour water, cleaning spray, or rubbing alcohol into the port. Even isopropyl alcohol can cause trouble if you use too much or if the phone is not fully dry before charging. Compressed air is also not the first choice for a deep lint blockage. It can push debris farther in, and some cans may release moisture or propellant if held incorrectly.
How to clean a charging port safely, step by step
1. Turn the phone off and unplug everything
Power the phone down completely. Remove the charging cable, any wired headphones, and accessories. This reduces the risk of electrical damage while you work and gives you a clearer view of the port.
Take off the case if it blocks your view or makes the phone hard to hold steady. Place the phone on a clean, well-lit table. Do not try this while walking, sitting in a car, or balancing the phone in one hand.
2. Inspect the port before touching it
Shine a flashlight into the charging port and look for a felt-like layer of dust or lint at the back. In many cases, that compacted buildup is what prevents the cable from seating fully.
Do not expect every port to look identical. USB-C ports have a center tongue with contacts on both sides, while Lightning ports have their own internal contact layout. The sensitive parts are small, so your tool should stay along the port walls and away from the connector pins as much as possible.
3. Loosen debris gently from the edges
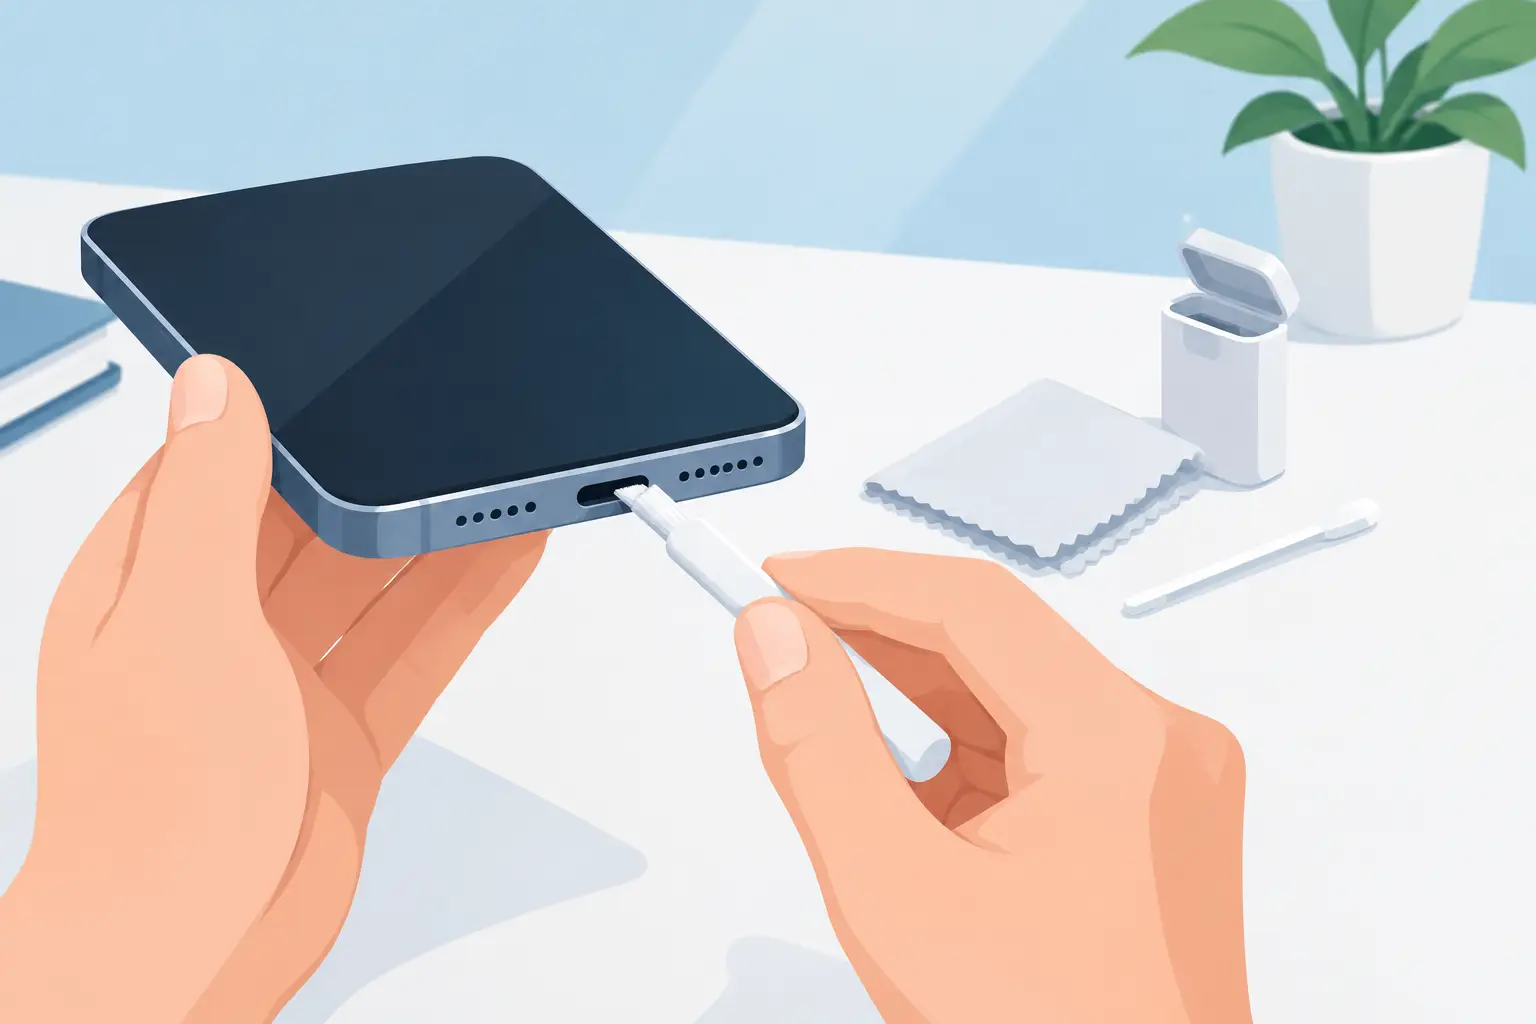
Use a dry wooden toothpick or plastic pick. Insert it only slightly, then work slowly around the inside edges of the port. Use very light pressure and short movements to lift debris out. Never force the pick to the bottom of the port.
Think of this as teasing lint free, not digging. If you feel resistance, stop and change your angle. A hard jab can damage the center tongue in a USB-C port or bend internal components that are difficult and costly to replace.
Pull out the tool regularly and wipe it on a microfiber cloth. You may need several gentle passes before the debris starts coming out. Large lint plugs often appear as dark gray or black fibers, especially in phones carried in jeans pockets.
4. Brush away loose dust and inspect again
Once the larger debris is out, use a soft dry brush around the port opening. Hold the phone with the port facing downward so loosened particles fall out instead of deeper inside.
Look into the port again under good light. You do not need to remove every speck of dust. Stop when the opening is clear enough for the cable to sit naturally and the internal contacts appear intact. Over-cleaning is a real risk when the port already works.
5. Test the connection carefully
Turn the phone back on and insert a clean, undamaged cable. It should go in straight and feel more secure than before. Start charging and leave the device on a stable surface for a few minutes.
Check whether charging stays connected without needing to bend or hold the cable. If the issue is gone, you are done. If it still disconnects, test another cable and adapter before blaming the port.
What not to do when the port will not charge
It is tempting to keep pushing the cable harder when it will not fit, but that can bend the connector or compact debris farther into the port. Never force a cable that feels blocked.
Do not use a vacuum cleaner with a narrow nozzle directly against the port. Static electricity and strong suction are unnecessary risks. Blowing into the port is not a great fix either, because breath carries moisture. A quick puff may move loose dust, but it will not safely remove compacted lint.
If you see green, white, or rusty-looking residue, stop cleaning. That can indicate corrosion from moisture exposure. Scraping corrosion may damage the contacts further, and plugging in power can make the problem worse.
When a clean port is not enough
A port can be clean yet still fail because of worn contacts, internal damage, battery trouble, or a faulty charging circuit. Consider professional inspection if your phone only charges at one angle after cleaning, gets unusually hot while charging, repeatedly shows a moisture warning, or does not recognize any cable that works on other devices.
The same goes for a loose center tongue inside a USB-C port, visible bent pins, or a port that moves when the cable is inserted. These are repair issues, not cleaning issues. Continuing to plug and unplug cables can turn a repairable fault into a more serious board-level problem.
For a used phone purchase, always test charging with a cable before committing. At Gadget Affair, checking basic functions in person is a practical way to confirm the device, cable fit, and charging behavior meet expectations before you bring it home.
Keep lint from building up again
A clean port usually stays that way longer with a few small habits. Keep your phone out of loose, dusty pockets when possible, wipe the cable connector occasionally, and avoid leaving the port exposed in a bag full of crumbs or debris. A fitted case with a port cover can help, although it may be inconvenient if you charge by cable several times a day.
If you use wireless charging, it can reduce cable wear but does not eliminate the need to keep the port clean. You may still need the port for data transfer, emergency charging, or accessories. Give it a quick visual check every few weeks, and clean only when you see buildup or notice a loose connection. Gentle maintenance beats a hard rescue job every time.